
Table of Contents
Food photography has become an art form in itself, enticing viewers with delicious visuals that leaves amazed. In this digital age, where sharing culinary creations on social media is a common practice, mastering the art of food photography can improve your online presence and make your dishes truly irresistible in photos. In this article, we will explore food photography techniques and tips to help you through essential food styling that will take your food photography business to the next level.

Food Photography Techniques and Styling
Food styling is all about presenting your dishes in a way that not only looks appetizing but also tells a story. Beautifully captured food images can attract more customers to your restaurant, entice foodies to try your recipes, and make your blog or social media account stand out.
1. Selecting the Right Props

One of the first steps in food styling is choosing the appropriate props. Consider the theme and mood you want to convey. For example, rustic wooden boards and antique cutlery can evoke a cozy homemade feel, while clean modern utensils and minimalist dishes can create a contemporary look. Your choice of props can transform the entire atmosphere of your photo.
2. Arranging and Composing Your Food

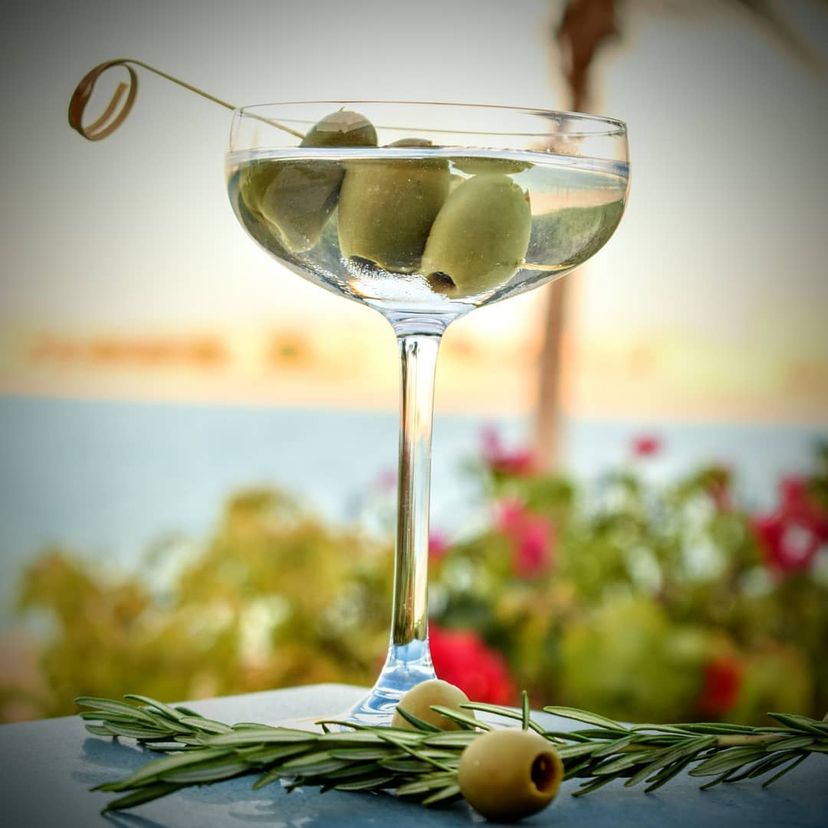
Your composition plays an important role in food photography. To capture desserts, get up close to emphasize textures and intricate details. Main courses look best in wider compositions that showcase the entire dish or highlight key ingredients. When photographing beverages, consider creative angles that draw attention to glassware, garnishes, and the liquid’s texture. Apply composition techniques like the rule of thirds and leading lines to create visually engaging photos.
What is the image size for zomato dish?
Menu item image: at least 1200 x 800 pixels. Ensure the whole dish is in the frame.
3. Balancing Colors and Textures

Color plays a significant role in food photography. Use a color wheel to understand color harmony. Complementary colors (opposites on the wheel) can create a vibrant, visually appealing contrast. Additionally, consider textures – combining smooth and rough textures can add depth and interest to your composition.
Do I need a DSLR for food photography?
So while a phone is a great way to start to get you used to other principles like lighting and composition, ultimately, if you want to take your food photography to a professional level, you’re going to need a DSLR or Mirrorless camera at some point.

4. Cuisine and Culture

When styling international dishes, research the cuisine and culture associated with the food. Incorporate traditional elements like spices, herbs, or tableware to add authenticity and context to your photos. This helps tell a richer story and connect with your audience.
Example:
International Dish: Sushi

Culture: Japanese
Background: Sushi is a traditional Japanese dish that has become widely popular around the world. It typically consists of vinegared rice combined with various ingredients such as seafood, vegetables, and sometimes tropical fruits. The dish is often accompanied by soy sauce, pickled ginger, and wasabi.
Cultural Significance: Sushi preparation in Japan is considered an art form, and the presentation of the dish is as important as its taste. The Japanese culture places a high value on precision, aesthetics, and balance, which is reflected in the meticulous arrangement of ingredients in sushi. The use of fresh, seasonal, and high-quality ingredients is a key aspect of Japanese culinary culture.
Styling Tips:
- Presentation and Plating: Emphasize the visual appeal of the dish. Arrange sushi pieces in an aesthetically pleasing manner on a traditional Japanese sushi plate. Use minimalistic and elegant tableware to enhance the dining experience.
- Colors and Textures: Incorporate a variety of colors and textures to mimic the diversity of ingredients in sushi. Consider using garnishes like edible flowers or microgreens for a touch of elegance.
- Cultural Elements: Integrate Japanese cultural elements into the dining setting. This could include traditional Japanese tableware, chopsticks, and perhaps a small Japanese tea set.
- Table Setting: Keep the table setting simple and clean to align with Japanese design principles. Consider using neutral colors with pops of red or black for a classic touch.
- Ambiance: Create a serene ambiance reminiscent of a traditional Japanese dining experience. Soft lighting, bamboo accents, and perhaps some subtle Japanese music can enhance the overall atmosphere.
5. Lighting

Proper lighting is crucial for food photography. To capture desserts, you might want to use soft, diffused light to highlight the textures and details. For main courses, a more balanced and natural lighting setup could work well, while for beverages, backlighting or sidelighting can enhance their visual appeal. Consider experimenting with natural light, artificial lighting, or a combination of both, depending on the specific dish and the desired mood.
How To Use Natural Light In Food Photography
- Natural light is often the best option for food photography as it lends a beautiful, soft quality to images. There are some key tips to make the most of available natural light:
- Shoot near a sunny window during the day for flattering illumination. Diffused daylight from overcast skies works well too. Avoid direct sunlight which can create harsh shadows.
- For even coverage, position the food perpendicular to the light source. You can also reflect light onto the subject using a white card or poster board as a makeshift reflector.
- Shooting within two hours of sunset often results in warm, golden hues that compliment food aesthetically. Experiment with different times of day.
- On cloudy days, a windowsill acts like a giant softbox. Adding reflective material behind the camera can bounce light back onto underexposed areas.
- Pay attention to how surroundings like table textures look in the light. Simple pops of color against neutral backgrounds photograph beautifully.
6. Equipment

Select the right photography equipment for each situation. Macro lenses are great for capturing dessert details, while versatile prime or zoom lenses are useful for main courses. Beverages may require a lens with a wide aperture to create a pleasing bokeh effect. Tripods can provide stability, especially in low-light situations, and a remote shutter.
For food photography, I suggest considering either a 24-70mm f/2.8 or a 24-105mm f/4 lens. While numerous zoom lenses excel in food photography, these two are my personal favorites and are frequently recommended by other food photographers.
7. Post-processing

I recommend using post-processing tools to enhance your images further. Adjust exposure, white balance, and contrast to ensure the colors are true to life. You can also retouch minor imperfections and sharpen the details. However, be mindful not to over-edit, as authenticity is essential in food photography.
How to Make Your Food Look Professional


professional food presentation and plating techniques:
Presenting food in an appetizing, restaurant-worthy style is key for food photographers and chefs. Some top techniques include using a plate that complements the colors of the dish. White or off-white plates are most common. Mound the largest components in the center and work outwards with smaller garnishes. Leave about 1/3 of the plate empty for negative space and balance.
Consider the height, using ingredients to build dimension rather than mounding everything flat. Crisp vegetables and edible flowers make great garnishes. Drizzle sauces decoratively around instead of obscuring the features. Slice breads or roll them to take up less space. Finally, plating with order and symmetry achieves a polished look whether for photos or service. Mastering these fundamentals elevates amateur dishes to professional-grade presentations.
The Power of Garnishes
Garnishes are your secret weapon in food styling. They can add an extra layer of detail and flavor to your shots.
1. Fresh Herbs

Fresh herbs like basil, cilantro, or parsley not only add a pop of color but also freshness and aroma to your photos. They work well as garnishes on soups, pasta, and salads.
2. Citrus Zest

A sprinkle of citrus zest, such as lemon or orange, can bring a burst of vibrancy to your dishes. It’s a great choice for desserts, seafood, or dishes with a hint of citrus flavor.
3. Microgreens

Microgreens are small, delicate greens that are perfect for garnishing. They add a touch of elegance and a fresh, organic feel to your photos.
Setting the Scene

The backdrop and environment play a significant role in food styling. Here are some additional tips:
1. Use Props Thoughtfully
Props should complement, not overwhelm, your dish. A cluttered scene can distract from the main subject. Keep it simple and let the food shine.
2. Mind the Background
A clean, uncluttered background is often the best choice. A plain, neutral background, such as a white tablecloth or a wooden table, can make your food pop.
3. Create a Story
Consider the story you want to tell with your food photography. For example, for a cozy, home-cooked vibe, you might include a cookbook, a cup of tea, or an open newspaper next to your dish.
Practice, Experiment, and Enjoy
Food styling is an art that takes time to master. Don’t be discouraged if your first attempts aren’t perfect. Experiment, learn from your experiences, and most importantly, have fun. Over time, you’ll develop your unique style and create food photos that leave your audience craving the dishes you capture.
How do I set my camera for food photography?
Settings: As a rule, low ISO (your camera’s sensitivity to light) and fast shutter speeds (how quickly your camera takes a photo) produces the best quality images by minimizing noise, increasing focus, reducing blurs, and camera shake effects.
Food photography is an art that combines creativity and culinary skills. With the right equipment, knowledge of techniques, and practice, you can make your dishes irresistible in photos. So, pick up your camera and go hit that shutter button!!!!
FAQs
- What camera is best for food photography?
- A DSLR or mirrorless camera with manual controls is ideal.
- Do I need expensive lighting equipment?
- While natural light is great, affordable lighting options can yield excellent results.
- How can I make my dishes look more appetizing?
- Focus on food styling, presentation, and garnishes.
- Which photo editing software is recommended for food photography?
- Adobe Lightroom and Snapseed are popular choices.
- How can I improve my food photography skills?
- Practice regularly, experiment with different techniques, and seek inspiration from other photographers.
Learn more about important guides in food photography.
Feel free to reach out to us and Follow us on Facebook and Instagram.