
Table of Contents
Night photography can be amazing and creative, especially when you use the best external flash. I’m here to guide you through the fascinating world of night photography, with a particular focus on the essential external flash.
In this comprehensive guide, we’ll discuss the art of night photography, exploring camera settings, essential rules, and ten invaluable tips to elevate your night shots. We’ll also discuss the advantages and challenges of night photography, offering practical advice for those just starting. But, our spotlight will be on the best external flash for night photography, why it’s a game-changer, and how to choose the right one.

Camera Settings for Night Photography
When getting into night photography, manual mode becomes your ally. It empowers you to take full control over your camera settings. Let’s explore how ISO, shutter speed, and aperture impact your night shots:
- ISO (Sensitivity): At night, you’ll often want to start with a low ISO, such as 100, to minimize noise in your images. As light diminishes, gradually increase the ISO, but be cautious not to go too high, as this can introduce unwanted grain.
- Shutter Speed: Night photography opens up a world of creative possibilities with long exposure times. This is where you can capture the beauty of light trails, starry skies, and smooth reflections. Ensure you use a sturdy tripod to prevent camera shake during these longer exposures.
- Aperture (F-number): A wide aperture, typically ranging from f/1.4 to f/2.8, allows more light into your lens. This is vital for gathering enough light in low-light conditions. However, keep in mind that a wider aperture reduces your depth of field, so consider your focus carefully.
White Balance and Shooting in RAW
To fine-tune your night shots, pay attention to white balance. Adjust it according to the lighting conditions at hand—common presets include tungsten, fluorescent, or daylight. Shooting in RAW format provides flexibility during post-processing, enabling you to correct colors and exposure accurately.
White Balance Settings
- Access your camera’s menu and navigate to the white balance settings.
- Choose the appropriate preset based on the lighting conditions. For example, select ‘Tungsten’ for indoor lighting.
- For precise control, consider using a custom white balance setting. Capture an image of a neutral gray card or surface in the same lighting conditions, and set that image as your custom white balance reference.
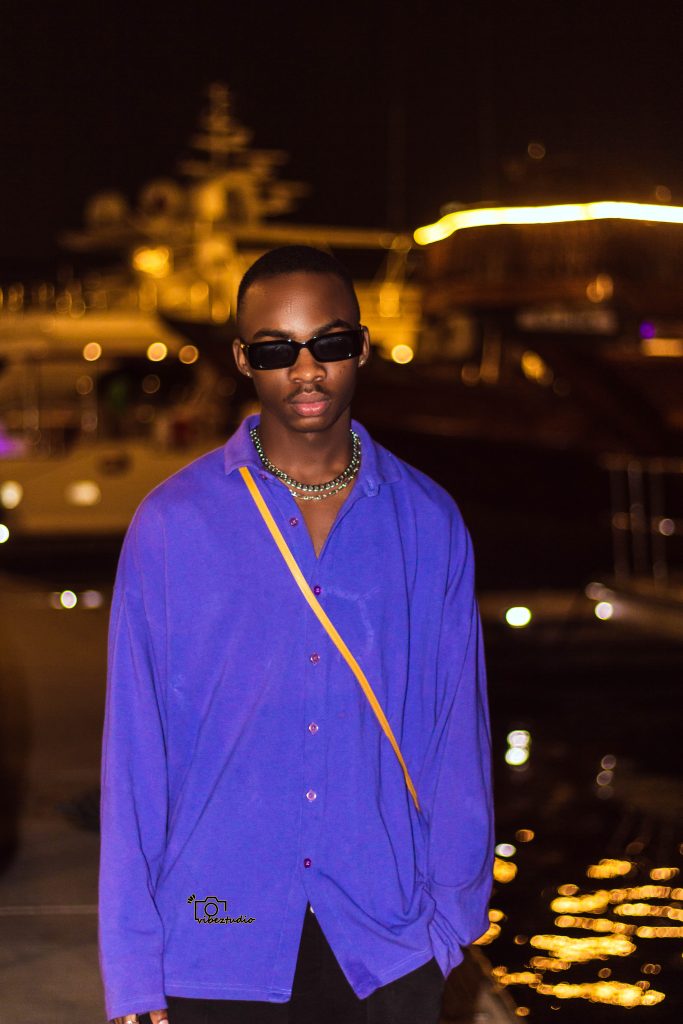
Night Portrait Photography with Flash

Shooting compelling night portraits with flash requires understanding key camera settings and lighting techniques. To capture subjects in low-light conditions with artificial lighting, set your shutter speed between 1/10-1/30 of a second to freeze movement while retaining ambient light. Use an ISO of 200-400 to balance exposure without excess noise, and choose an aperture fitting your desired depth of field.
if you have a flash on your camera, enable the AF Assist Beam. The AF Assist Beam is a red flash of light, that’s emitted from the front of your flash, when you press the focus button. The flash of light provides just enough light, for just enough time, for your camera to lock focus
Ensure flash synchronization speed matches your camera’s maximum shutter speed to avoid interference. Adjust flash brightness for the desired effect, and consider off-camera flash for more creative control over lighting. Bouncing the flash away from and onto ceilings or walls creates softer, flattering light. When shooting without flash, increase ISO up to 1000 and use a tripod at slower shutter speeds to leverage available ambient light sources for unique atmospheric night portraits without flash that feature the scene.
Rule Of Thirds

The rule of thirds is a fundamental composition technique that enhances the looks of your night shots. Visualize your frame divided into a 3×3 grid and place key elements or points of interest along these lines. This adds balance and intrigue to your photos.
Long Exposure

Long exposure photography at night is a thing of beauty. It allows you to capture light trails, starry skies, and dreamlike water reflections. Experiment with varying exposure times to create your desired effects. A tripod and a remote shutter release or your camera’s timer can help reduce camera shake.
10 Night Photography Tips
- Scout Your Location: Visit your chosen location during daylight hours to plan compositions and scout interesting features.
- Use a Tripod: A sturdy tripod is essential for stable long exposures. Invest in one that suits your gear and is easy to carry.
- Shoot in Manual Mode: Take full control of your camera settings for optimal results. Adjust ISO, aperture, and shutter speed according to the scene.
- Long Exposure Magic: Experiment with long exposures to capture light trails, starry skies, and dreamy reflections in water bodies.
- Master Manual Focus: Autofocus can struggle in low light. Learn to focus manually for precise results, especially in challenging conditions.
- Bring Extra Batteries: Night photography can be power-intensive. Always have spare batteries for your camera and flash.
- Use Remote Shutter Release: Minimize camera shake by using a remote shutter release or the camera’s timer.
- Experiment with Light Painting: Create unique effects by ‘painting’ with light sources like flashlights or LED panels.
- Mind the Moon: The moon can significantly impact your night photography. Consider its phase and position in your compositions.
- Stay Patient: Night photography can be challenging, but the results are worth it. Be patient, and don’t be afraid to make mistakes.
Advantages and Challenges of Night Photography
Night photography has some good things. You can take nice pictures of lit-up cities, beautiful starry skies, and create a certain mood. But it also has some problems
Advantages
- Unique Compositions: The night offers a canvas of unique scenes and atmospheric lighting.
- Light Trails and Stars: Long exposures reveal mesmerizing light trails and the grandeur of the night sky.
- Reduced Distractions: Night photography often removes unwanted distractions, leaving serene, captivating scenes.
- Enhanced Colors: Nighttime can bring out vibrant and dramatic colors.
- Dynamic Cityscapes: Urban environments transform into dazzling landscapes after dark.
- Silhouettes: Create dramatic silhouettes of subjects against the night sky.
- Reflections: Water surfaces become mirror-like, offering stunning reflections.
- Moonlit Magic: Utilize moonlight for unique lighting effects.
Challenges
- Limited Available Light: Finding sufficient light sources can be a challenge.
- Long Exposure Times: Long exposures require patience and the right equipment.
- Noise and Graininess: High ISO settings can introduce noise and grain into your photos.
- Weather Conditions: The night can be harsh; be prepared for changing weather.
- Safety Concerns: When shooting in the dark, safety should be a priority. Always be aware of your surroundings.
- Equipment Considerations: Night photography may require specific gear, such as a sturdy tripod and remote shutter release.
Why Use An External Flash in Night Photography
An external flash can be your secret weapon in night photography. It provides controlled, versatile lighting that elevates your shots. Whether you’re capturing portraits or adding drama to a scene, the external flash is your creative tool.
These tables below outline 5 key differences between using an external flash and not using one when taking photographs at night. It’s important to consider these factors when deciding whether to use external flash for a particular night photography scenario.
| Aspect | With External Flash | Without External Flash |
|---|---|---|
| Camera Settings | Adjustments may include flash power, angle, and sync speed. | Focus on adjusting ISO, aperture, and shutter speed. |
| Exposure Control | Easier to control exposure with added flash. | Exposure control depends solely on available light. |
| Creative Possibilities | Offers creative possibilities with flash settings. | Limited creative options without additional light. |
| Consistency in Results | Flash provides consistent lighting for each shot. | Results may vary based on changing ambient light. |
| Depth and Texture Detail | Flash helps capture depth and texture in the subject. | May struggle to capture depth in low light. |
Flash Settings for Night Photography
Whether photographing landscapes under a starry sky or capturing portraits in dim environments, night flash photography allows creative expression through available light. Understanding key camera and flash settings provides full control to achieve any desired lighting effect. In aperture or manual mode, set shutter speeds matching flash synchronization for balanced exposures. ISO compensates for darkness while tripods stabilize cameras during longer exposures.
Flash settings impact brightness levels and coloring. Off-camera flashes offer flexibility, backlighting or supplementing ambient light. Bounced flash creates softer illumination by redirecting light onto nearby surfaces. Avoid faster-than-maximum synchronization speeds to prevent light obstruction. ISO impacts quality, kept low when possible. Without flash, utilize higher ISOs compensating for darkness alongside slower shutter speeds and tripods preventing shake on long exposures. Embracing available city, street or neon lights introduces eye-catching interest.
When using an external flash at night, consider these settings:
- Flash Power: Adjust the flash intensity to match your desired effect, and experiment with different power levels to find the right balance.
- Flash Angle: Use diffusers or bounce flash techniques to soften and control the light direction.
- Sync Speed: Ensure your camera’s flash sync speed aligns with your external flash’s capabilities.
Outdoor Night Photography Lighting
Mastering the nuanced art of outdoor night photography involves effectively controlling artificial light. Key techniques include employing bi-color continuous lights to adjust the warming temperature; using low level landscape lighting to match the brightness of starlight; and warming filters to create pleasing light colors from blue LEDs. Reflecting lower intensity light at angles produces depth and dimension through natural shadows.
Recent innovations in adjustable LED panels and smaller, portable lighting options provide precise temperature control and greater feasibility. With practice manipulating various intensities, angles and temperatures, photographers can beautifully balance subject illumination and ambient scene integrity. Controlling the spread of light through snoots or coverings prevents unwanted leaks while achieving balanced, vibrant imagery of nighttime portraits and landscapes under night flash photography settings.
What are the best camera settings for outdoor flash photography?
ISO 100 – for the best image quality. Aperture f11 or F16 – for great depth of field. 1/160s shutter speed – to make sure we don’t have shading by the shutter curtain. Control the brightness of the image by adjusting the intensity after flash.
Night Action Photography Settings
Night photography presents unique challenges due to low light levels. However, with the proper gear and technique, photographers can create compelling images even in darkness. A key tool is flash photography, which provides supplemental illumination to expose subjects and freeze motion.
On-camera or off-camera flash can help overcome the limitations of available light. Whether mounted on the hot shoe or placed off to the side, flash adds brightness without increasing ISO sensitivity and noise levels. For action shots, high-speed sync mode allows faster shutter speeds that stop subjects in their tracks despite flash durations. This is especially helpful for panning shots that introduce intentional motion blur.

When using flash, be mindful of its range and power. Adjust output and position flash units to efficiently light subjects without blowing highlights. For stage performances or sports, multiple flash units placed around the scene can provide balanced, shadow-free illumination. Photographers must also take precautions to prevent red-eye and consider diffusers or bounce techniques that soften the flash.
With flash introduction, night shots gain clarity and dynamism previously impossible. Concert crowds and nighttime celebrations now come to life through strategic supplemental lighting. For action aficionados, the flash has unlocked a whole new world of low-light sports and activities. With care and creativity, flash expands the photographic possibilities of night.
The Rule of 500 In Night Photography
The Rule of 500 (or 300) is a guideline in night photography to determine the maximum exposure time before stars begin to streak in long-exposure shots. The formula is to take the number 500 (or 300) and divide it by the focal length of your lens. For instance, if you are using a 20-mm wide-angle lens, the calculation would be 500 / 20 = 25. This result indicates that you can safely expose your shot for up to 25 seconds on a tripod before the movement of the stars becomes noticeable and causes streaking in your image.

10 Best External Flashes for Night Photography
- Canon Speedlite 600EX II-RT
- Key Features: High-speed sync, powerful output, and reliability.
- Pros: Exceptional build quality, wireless capabilities, and versatility.
- Cons: Higher price point.
- Nikon SB-5000 AF Speedlight
- Key Features: Fast recycling time, wireless compatibility, and precise lighting control.
- Pros: Reliable performance, weather-sealed construction, and intuitive controls.
- Cons: Pricey investment.
- Godox V860II
- Key Features: Affordable, built-in radio transceiver, and excellent battery life.
- Pros: Value for money, TTL compatibility, and various power settings.
- Cons: Build quality could be better.
- Yongnuo YN560-IV
- Key Features: Budget-friendly, manual flash, and built-in triggering system.
- Pros: Cost-effective, versatile, and easy to use.
- Cons: Lack of TTL support.
- Sony HVL-F60RM
- Key Features: High-speed sync, powerful output, and quick recycling.
- Pros: Excellent wireless control, reliable performance, and compatibility with Sony cameras.
- Cons: Premium price.
- Neewer TT560
- Key Features: Very budget-friendly, manual flash, and simple operation.
- Pros: Affordable, lightweight, and great for beginners.
- Cons: Limited features.
- Profoto A1X
- Key Features: Compact, high-quality lighting, and natural light-shaping capabilities.
- Pros: Outstanding build quality, intuitive interface, and seamless compatibility.
- Cons: Premium pricing.
- Metz Mecablitz 64 AF-1
- Key Features: High guide number, versatile lighting, and built-in bounce card.
- Pros: Durable construction, extensive features, and exceptional power.
- Cons: Relatively high cost.
- Nissin Di700A
- Key Features: Wireless TTL, fast recycling, and user-friendly interface.
- Pros: Affordable, dependable performance, and compatible with various camera systems.
- Cons: Limited advanced features.
- Sigma EF-630
- Key Features: Powerful output, wireless capabilities, and high-speed sync.
- Pros: Reliable performance, compatibility with multiple camera brands, and well-priced.
- Cons: Bulkier design.
Outdoor Night Photography in Dubai: Hire a Professional Photographer


Dubai offers unique opportunities for capturing stunning nighttime images of its iconic skyline and well-lit cityscape. Locations such as the Burj Khalifa, Dubai Marina, and Palm Jumeirah provide breathtaking backdrops, with modern architecture and reflections enhancing compositions. Known for impressive skyscrapers and wonders, Dubai is a photographer’s paradise, with its infrastructure allowing optimal conditions.
Capturing the world’s tallest building, Burj Khalifa, offers panoramic views of the constantly evolving skyline. Advance tickets secure prime window spots for detailed shots of landmarks. Security checks require attention, while lenskirts eliminate reflections. The Dubai Marina features illuminated towers and water reflections creating picturesque scenes, benefited through long exposures using filters. Palm Jumeirah offers alternative perspectives—the marina from one side, Burj Al Arab from the other—using longer lenses close to shorelines.
Dubai’s developments continually birth fresh subjects. Staying informed of additions grants unique angles. Conditions demand preparation, as security screenings atop popular attractions like Burj Khalifa necessitate minimal baggage. Lighting varies, so experimental exposures and tripods stabilize low-light shots.
For professional guidance capturing the illuminated city, hire Vibeztudio Photography—Dubai’s leading night photographers.
Night photography is an amazing journey that combines technical skill with artistic vision. With the right camera settings, composition rules, and ten tips in your toolkit, you’ll be well-equipped to capture stunning nightscapes. And when you introduce the best external flash into the mix, you’ll unlock even more creative possibilities.
Now that you’re armed with knowledge, grab your camera, head out into the night, and let your creativity shine. Remember, every great photographer started as a beginner. Your photography dreams are within reach—now go hit that shutter button!
This is great stuff ????
Super, thank you