
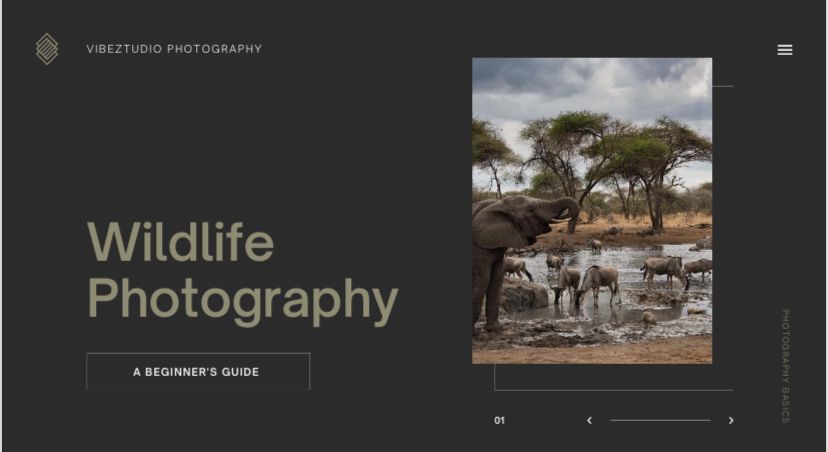
Wildlife photography can be challenging as animals are constantly moving and you need to be quick to get the perfect shot. Here are some tips for taking better wildlife photos:
Use a good zoom lens to get close to the action without disturbing the animals. Look for habitats where wildlife is likely to be active at the time of day you are photographing. Bring long lenses of 200mm or more to get closeups without scaring animals away. Move slowly and quietly to get within shooting range without alarming wildlife. Wait patiently, observing animal behavior for the perfect moment to capture in frame.
A fast shutter speed of at least 1/500 sec is recommended to freeze motion and avoid blur. Check lighting conditions and shoot in the early morning or late afternoon for soft natural light. Focusing correctly is important, so try to anticipate where the animal will be to get tack sharp photos. Having the right settings will also help you catch that scenic wildlife moment.
Understanding Wildlife Behavior for Better Shots
Studying Animal Habits and Patterns
To capture compelling wildlife photographs, it’s crucial to understand the behavior and routines of your subjects. By studying animals in their natural habitat, you can predict when they are most active and what kinds of behaviors they might exhibit.
- Observing feeding times, mating rituals, and territorial displays can provide invaluable insights into the best moments to have your camera ready.
- Seasonal changes also play a significant role in animal behavior. Migration patterns, hibernation periods, and breeding seasons all offer unique photographic opportunities.
Tip: Spend time in the field without your camera to truly observe and learn from wildlife. This investment in time pays off when you’re able to anticipate an animal’s next move and capture a stunning image.

Anticipating Action and Capturing the Moment
Anticipating action in wildlife photography is akin to learning a dance. Each movement, no matter how subtle, can be a precursor to a dramatic moment worth capturing. To improve your chances of catching these fleeting instances, familiarize yourself with the behavior of your subject. For example, birds might flutter their wings before taking flight, or a predator may tense up before a pounce.
- Be patient and observe carefully.
- Learn to recognize tell-tale signs of impending action.
- Position yourself strategically, keeping the sun behind you to ensure good lighting.
- Stay ready with your finger on the shutter button.
Tip: Always keep your camera settings adjusted for a quick shot. High shutter speeds and continuous shooting modes can be crucial in these situations.
Remember, the key is not just to react, but to anticipate. By predicting an animal’s behavior, you can compose your shot in advance and focus on timing. This proactive approach often yields the most dynamic and compelling wildlife photographs.
Essential Gear for Wildlife Photography
Which camera is best for wildlife photography for beginners?
For beginners just starting out in wildlife photography, a DSLR or mirrorless camera with an around 20 megapixel sensor is a good choice. When considering camera bodies, look for features like weather sealing and robust construction, which can withstand the rigors of outdoor photography. Mirrorless cameras are gaining popularity for their compact size and silent shooting capabilities, while DSLRs remain favored for their optical viewfinders and battery life.Some good options to consider are:
- Canon EOS Rebel T7/2000D – An affordable DSLR with an APS-C sensor capable of producing sharp images. Its auto settings make it easy to use.
- Nikon D3500 – Another entry-level DSLR that offers great image quality and performance for a low price.
- Sony A600 – A Mirrorless camera with a large APS-C size sensor providing excellent low-light ability. It has fast autofocus.
- Canon PowerShot SX60 HS – This super zoom compact camera has a 65x optical zoom, allowing you to get close to wildlife from far away. It produces high quality photos without changing lenses.
- Nikon Coolpix B500 – Another good compact super zoom option, with a 40x optical zoom, for beginners wanting an easy to use camera.
In addition to the camera body itself, you’ll want a lens that provides good reach. A nice starter lens is a 55-250mm f/4.5-6.3 zoom lens. This allows you to get closer to wildlife from a safe distance without disturbing them. With its zoom range, you don’t need to physically move closer and can still capture nice shots of wildlife in their natural habitats.
What is the best lens length for wildlife photography?
When it comes to lens choice for wildlife photography, longer focal lengths are typically preferable. For mammals and birds, lenses in the 300mm or more range will allow you to get close without disturbing your subjects. A 300mm prime lens can work well for many types of wildlife photography as it provides an adequate reach. For birds in particular, you may want additional zoom capability for more flexibility.
Lenses in the 200-400mm or 400-600mm range are very popular for bird and wildlife photographers. They offer magnified views from farther away without needing to swap lenses. One downside is such super telephoto lenses can be physically large and heavy, which might make handholding uncomfortable on long shoots. For this reason, using a Tripod is advisable with larger wildlife lenses. Overall, around 300mm and up is a good lens range for most wildlife subjects.
For beginners just starting out in wildlife photography, a lens in the 250-500mm focal range will provide sufficient magnification without breaking the bank. Some good options to consider include:
- Canon EF-S 55-250mm f/4-5.6 IS STM – This affordable telephoto zoom lets you fill the frame on distant wildlife from 255mm all the way up to 400mm equivalent. It’s easy to handhold for casual shooting.
- Nikon AF-P 70-300mm f/4.5-6.3G ED VR – Offering a versatile 70-300mm zoom range, this lens provides good reach for a variety of wildlife subjects. Vibration Reduction helps when handholding at longer focal lengths.
- Sigma 150-600mm f/5-6.3 DG OS HSM Contemporary – For a super telephoto on a budget, this lens goes up to an effective 900mm. It’s great for birds, wildlife parks, and safaris. Its optical stabilization helps achieve sharp shots.
- Sony FE 200-600mm f/5.6-6.3 G OSS – This full-frame compatible lens is versatile for everything from landscapes to wildlife. Its impressive zoom range is ideal for observing nature from a distance.
Choosing lenses is a balance between reach, speed, and weight. Prime lenses offer superior sharpness and a wider aperture, ideal for low light conditions, but lack flexibility. Zoom lenses, on the other hand, provide versatility but may compromise on maximum aperture.
Here’s a quick reference for lens focal lengths:
- Under 200mm: Ideal for larger wildlife and scenic shots.
- 200mm to 400mm: A versatile range for various wildlife scenarios.
- 400mm and above: Best for capturing distant or small wildlife without disturbance.
Tripods, Monopods, and Other Stabilizing Equipment
Stabilizing your camera is crucial for sharp wildlife images, especially in low light conditions or when using long lenses. Tripods are the most stable option, but can be heavy when you need to move quickly. Monopods offer more mobility while still providing support, making them ideal for tracking moving subjects.
- Tripods: Best for stationary wildlife and long exposure shots.
- Monopods: Great for on-the-go shooting and when space is limited.
- Bean Bags: Useful for ground-level shooting or when a tripod is impractical.
Tip: Always choose a tripod or monopod with a smooth head for quick and precise adjustments.
Other stabilizing tools like gimbal heads and bean bags can also be part of a wildlife photographer’s kit. Gimbal heads allow for balanced movement of heavy lenses, while bean bags can be molded to uneven surfaces, providing a makeshift support system.
The Role of Camouflage and Hides in Getting Closer

Achieving proximity to wildlife without disturbing the natural behavior of animals is a critical aspect of wildlife photography. Utilizing camouflage gear and hides allows photographers to blend into the environment, reducing the likelihood of being detected by the subject.
Camouflage clothing is designed to mimic the textures and colors of the natural surroundings, making the photographer less conspicuous. Hides, on the other hand, are shelters that can range from simple cloth blinds to elaborate structures with one-way glass.
- Clothing: Wear patterns that match the environment.
- Hides: Use natural materials or specially designed tents.
- Movement: Minimize movements and avoid sudden actions.
Tip: When using hides, it’s essential to enter and settle in your spot well before the wildlife activity peaks, as animals are highly sensitive to changes in their environment.
Remember, the goal is to observe and capture wildlife without impacting their natural state. Patience and respect for the wildlife are paramount when using camouflage and hides to get closer to your subjects.
Mastering Camera Settings for Dynamic Wildlife Images
Getting The Right Shutter Speed
Shutter speed is an important factor to consider when photographing wildlife. Fast shutter speeds are usually required to capture movement clearly without blur. As a general rule, you’ll want a shutter speed that is equal to or faster than the reciprocal of your lens focal length. So with a 300mm lens, 1/300 sec or faster is recommended.
Sometimes even faster shutter speeds in the 1/500-1/1000 sec range may be needed to freeze action like birds in flight. It also helps to anticipate an animal’s movements so you can pre-focus and time when to snap the shutter. Using a high enough ISO setting to allow for faster shutter speeds is also key, even if it means adding some noise to images. Using a burst mode to take a series of shots increases the odds of capturing an animal in motion sharply.
Shutter Speed Recommendations:
- Birds in flight: 1/2000 sec or faster
- Running mammals: 1/1000 sec or faster
- Slow-moving subjects: 1/250 sec or slower
Tip: Always be ready to adjust your shutter speed based on the behavior and speed of the wildlife you’re photographing. It’s a balance between capturing clarity and conveying motion.
Remember, the right shutter speed varies not only with the subject’s speed but also with the direction of movement relative to the camera. Movement towards or away from the lens may require different settings compared to movement across the field of view. Experimenting with different speeds can lead to unique and compelling images that tell a story about the life of your wild subjects.
Aperture Tips for Wildlife Photography
Aperture is another important setting to consider for wildlife photography. In general, a mid-range aperture like f/8 is well-suited for landscapes and wildlife shots where you want a large depth of field. This allows the subject and background to both be in focus. However, sometimes you may want to use a wider aperture like f/4 or f/5.6 to attract more light, which allows faster shutter speeds to freeze motion.
Just be aware depth of field will be more shallow. For portraits of animals, a wider aperture can also create a nice bokeh background separation from the subject. When shooting in low light conditions, don’t be afraid to open up the aperture even more, although image quality may decrease at the lens’s maximum aperture. Using a tripod can also allow you to use a wider aperture.
Here’s a quick reference guide to help you choose the right aperture settings:
- f/2.8 – f/4: Ideal for isolating subjects and achieving a creamy bokeh.
- f/5.6 – f/8: A good balance for subject sharpness and background detail.
- f/11 – f/16: Best for capturing detailed landscapes with wildlife in view.
Tip: Always consider the lighting conditions and your lens capabilities when selecting an aperture. In low light, you may need to opt for a wider aperture to avoid increasing the ISO too much, which can introduce noise into your images.
Experimenting with different apertures will not only help you understand how they affect your images but also allow you to express your creative vision more effectively. Remember, the ‘right’ settings depend on the story you want to tell through your photograph.
ISO and Noise: Balancing Sensitivity and Quality
In wildlife photography, ISO controls the camera’s sensitivity to light, which is crucial when shooting in varying light conditions. However, a higher ISO can also lead to increased noise, which appears as grain or speckles, degrading image quality. The key is to find the balance between sufficient light sensitivity and minimal noise.
- Use the lowest ISO setting that allows for a fast enough shutter speed to capture sharp images without motion blur. As a general rule, start with ISO 100 or 200 in bright conditions and adjust upwards as needed.
- Evaluate the noise levels at different ISO settings on your camera. Some cameras handle high ISO settings better than others. Here’s a simple table to illustrate the trade-off between ISO settings and noise levels:
| ISO Setting | Expected Noise Level |
|---|---|
| Low (100-400) | Minimal Noise |
| Medium (800-1600) | Moderate Noise |
| High (3200+) | Noticeable Noise |
Tip: Always check your camera’s histogram to ensure proper exposure. A well-exposed photo will have less noise when you increase the ISO than an underexposed photo that requires correction in post-processing.
Composition Techniques in Wildlife Photography


The Rule of Thirds and the Golden Ratio
The Rule of Thirds is a fundamental composition technique in wildlife photography that involves dividing the frame into nine equal segments by two equally spaced horizontal lines and two equally spaced vertical lines. By placing the subject along these lines or at their intersections, photographers can create more tension, energy, and interest in the composition than simply centering the subject would.
The Golden Ratio, another powerful compositional tool, is a bit more complex. It’s based on a mathematical ratio of 1:1.618, known as Phi, which has been used in art and architecture for centuries. This ratio can be applied to create a spiral composition that naturally draws the viewer’s eye towards the subject.
- Use the Rule of Thirds to position your subject off-center for a more engaging image.
- Apply the Golden Ratio to guide the viewer’s eye through the photograph.
- Experiment with both techniques to see which enhances your subject the most.
Remember, while these rules provide a great starting point, the most compelling images often come from breaking the rules and following your creative instincts.
Using Natural Elements to Frame Your Subject
In wildlife photography, the use of natural elements to frame your subject can add depth and context to your images. By strategically positioning trees, branches, leaves, or even rocks around the edges of your composition, you create a ‘natural frame’ that draws the viewer’s eye directly to the animal. This technique not only emphasizes the subject but also enhances the storytelling aspect of the photograph.
- Consider the following when framing with natural elements:
- Look for natural lines and shapes that complement the form of your wildlife subject.
- Use the frame to block out distracting elements in the background or foreground.
- Adjust your position or wait for the right moment when the animal moves into the perfect spot within the frame.
Tip: Always be mindful of the background and edges of your frame when composing your shot. A well-placed natural frame can turn a good photo into a great one, but a poorly considered frame can distract from the subject.
The Impact of Perspective and Eye Level
Changing your perspective can dramatically alter the impact of your wildlife photographs. By adjusting your eye level to match that of your subject, you create a more intimate and engaging shot. This technique draws the viewer into the animal’s world, offering a glimpse from their point of view.
- When photographing larger animals, such as deer or bears, getting down to their eye level can make your images more powerful. Conversely, for smaller creatures like birds or insects, you might need to get low to the ground or even lie flat to achieve the right perspective.
Tip: Always consider the background when changing your perspective. A lower angle can help isolate the subject against a clean sky or distant landscape, free from clutter and distractions.
Lighting in Wildlife Photography
Understanding Golden Hour and Blue Hour
The Golden Hour, occurring shortly after sunrise or before sunset, offers a warm, soft light that can add a magical quality to wildlife photographs. During this time, the low angle of the sun casts long shadows and produces a diffused light that reduces contrast and can enhance the textures and colors of animals and their surroundings.
Blue Hour, by contrast, is the period of twilight when the sun is below the horizon, and the indirect sunlight takes on a predominantly blue hue. This cooler light can give images a serene and mysterious atmosphere, ideal for capturing wildlife in a different mood or context.
- Golden Hour: Warm, soft light; long shadows; enhanced textures and colors.
- Blue Hour: Cool, blue light; serene atmosphere; mysterious mood.
Tip: To make the most of these unique lighting conditions, plan your photography sessions around the sunrise and sunset times, and be prepared to adjust your camera settings quickly as the light changes.
Managing Harsh Midday Light
Harsh midday light can present a challenge for wildlife photographers, often resulting in strong shadows and overexposed highlights. However, with a few strategies, you can turn these conditions to your advantage.
Firstly, consider using a polarizing filter to reduce glare and enhance the sky’s color, giving your images more depth. Additionally, adjusting your camera’s exposure compensation can help manage the bright light. Here’s a simple guideline:
- -1 EV: Slightly overcast conditions
- -2 EV: Bright sunny conditions
- -3 EV: Snowy or sandy environments reflecting significant light
Tip: Always check your camera’s histogram to ensure you’re not losing detail in the highlights or shadows.
When possible, use natural features like trees or cliffs to create shaded areas that can serve as a makeshift studio. This technique allows for more even lighting on your subject. Lastly, embrace the high contrast by focusing on compositions that benefit from stark light and shadow interplay, such as silhouettes or patterns in nature.
Utilizing Weather Conditions to Enhance Mood
Weather plays a pivotal role in wildlife photography, often adding a dramatic touch or a serene backdrop to your images. By understanding and utilizing different weather conditions, you can significantly enhance the mood of your photographs.
For instance, overcast skies can provide soft, diffused light that is perfect for capturing the intricate details of an animal’s fur or feathers without the harsh shadows that sunny days can create. Conversely, the golden glow of early morning or late afternoon sun can add warmth and depth to your images, highlighting the textures and colors of wildlife.
Fog and mist can create an ethereal atmosphere, giving your photos a mysterious or dreamlike quality. Here’s a quick guide to using weather to your advantage:
- Overcast Skies: Soft light, no harsh shadows, great for detail shots
- Golden Hour: Warm light, adds depth and texture
- Fog/Mist: Creates a mystical or ethereal mood
- Rain: Can add a dynamic element, showing animals in a different context
Tip: Always be prepared for changing weather conditions by packing protective gear for your camera and yourself. This not only ensures the safety of your equipment but also allows you to comfortably wait for the perfect moment to capture that unique shot.
Post-Processing Tips for Wildlife Photographs
Basic Adjustments: Exposure, Contrast, and Color
In wildlife photography, the post-processing stage is crucial for enhancing the visual appeal of your images. Basic adjustments such as exposure, contrast, and color are the foundational steps in this process. Proper exposure correction can bring out the details in shadows and highlights, ensuring that your subject is neither overexposed nor lost in darkness.
Contrast adjustment adds depth to your photos by accentuating the differences between the light and dark areas. This can help your subject stand out and give your image a more three-dimensional feel. Meanwhile, color adjustments allow you to correct any color casts and enhance the natural hues of the wildlife and their environment, making the image more vibrant and true to life.
Remember, while making these adjustments, it’s important to maintain a natural look to avoid over-processing:
- Ensure the exposure is balanced, not too bright or too dark.
- Adjust contrast to add depth but avoid making the image look unnatural.
- Enhance colors to reflect the true environment, but keep the saturation in check to avoid overly vivid hues.
Tip: Always work on a copy of your original image file to preserve the unedited version. This allows you to revisit the original if needed and provides a reference point to gauge the extent of your adjustments.
Advanced Techniques: Sharpening, Noise Reduction, and Cropping
Once you’ve made basic adjustments to your wildlife photographs, it’s time to refine them with advanced techniques. Sharpening can bring out the fine details in fur or feathers, making your subject pop against its background. However, it’s crucial to avoid over-sharpening, which can introduce unwanted artifacts.
Noise reduction is essential, especially for shots taken in low light or at high ISO settings. While some noise can add texture and mood to an image, too much can detract from the clarity of your wildlife subject. Balancing noise reduction with detail retention is key.
Cropping can transform a good photo into a great one by removing distractions and focusing the viewer’s attention. Remember, though, that excessive cropping can reduce image quality. Here’s a simple guideline to follow:
- Rule of Thirds: Place the subject at the intersection of dividing lines for a balanced composition.
- Minimal Cropping: Crop just enough to enhance the composition without compromising image quality.
- Aspect Ratio: Maintain consistent aspect ratios for a cohesive look in your portfolio.
Tip: Always keep a copy of the original photo before applying advanced edits. This allows you to revisit the raw image if needed and ensures you don’t lose any data through the editing process.
Ethical Considerations in Wildlife Photo Editing
In of wildlife photography, the power of post-processing can be a double-edged sword. While it allows photographers to enhance the visual appeal of their images, it also raises important ethical considerations. It’s crucial to maintain the integrity of the wildlife subject and the natural environment it inhabits. Excessive manipulation that alters the reality of the scene can mislead viewers and detract from the photograph’s authenticity.
- Authenticity and truthfulness should guide your editing process. Here are some guidelines to consider:
- Avoid adding or removing elements from the image that change the story or context.
- Keep color adjustments realistic, reflecting the true colors of the animal and habitat.
- Use cropping to improve composition, but not to misrepresent the size or proximity of the wildlife.
Tip: Always ask yourself if the edits you’re making are truthful to the moment you captured. If your alterations change the narrative or misrepresent the subject, it’s worth reconsidering them.
Understanding and Following Local Regulations
When venturing into wildlife photography, it’s crucial to be aware of and adhere to the local regulations governing the area you’re exploring. These rules are in place to protect both the wildlife and their habitats, ensuring that future generations can enjoy and photograph these natural wonders.
- Always research the regulations specific to the region you’ll be visiting. This can include restrictions on the use of certain equipment, limitations on access during breeding seasons, or specific guidelines for interacting with wildlife.
- Here’s a quick checklist to help you stay compliant:
- Obtain necessary permits or passes.
- Respect restricted areas and times.
- Follow guidelines for safe and ethical wildlife encounters.
- Be aware of species-specific regulations.
Photography Competitions and Exhibitions
Participating in photography competitions and exhibitions can be a highly rewarding experience for wildlife photographers. Not only do these events provide an opportunity to showcase your work, but they also offer the chance to gain recognition and receive valuable feedback from peers and professionals.
- Research competitions and exhibitions that align with your style and subject matter.
- Prepare your best work, ensuring each piece is meticulously edited and presented.
- Understand the rules and categories to increase your chances of success.
Remember, the goal is not just to win, but to learn and grow as a photographer through the experience.
Networking at these events can lead to new opportunities and collaborations. Whether you’re a seasoned professional or a budding enthusiast, the exposure gained can be instrumental in advancing your wildlife photography journey.
Building a Network with Fellow Wildlife Photographers
Building a strong network with fellow wildlife photographers can be incredibly rewarding, both personally and professionally. Engaging with a community of like-minded individuals provides opportunities for learning, sharing experiences, and collaborating on projects. Here are some steps to help you get started:
- Attend photography workshops, seminars, and meet-ups to connect with peers.
- Join photography clubs or online forums dedicated to wildlife photography.
- Participate in photo walks or organized trips that focus on wildlife.
Tip: Always be open to sharing your knowledge and experiences. Networking is a two-way street, and mutual support is key to building lasting relationships.
Remember, the goal is not just to exchange business cards but to foster genuine connections that can lead to creative growth and opportunities. As you become more involved in the community, you may find yourself part of a valuable support system that can help navigate the challenges of wildlife photography.
Frequently Asked Questions
What are the best practices for studying animal behavior to improve wildlife photography?
To improve your wildlife photography by studying animal behavior, spend time observing wildlife in their natural habitat, learn about their habits and patterns from books or experts, and use trail cameras to monitor behavior when you’re not present. Patience and regular practice are key to anticipating and capturing unique moments.
What is the best time for wildlife photography?
The best times for wildlife photography are early mornings and late afternoons. In the early morning hours, you can take advantage of the soft glowing light to capture animal portraits. Many species are most active at these times when searching for food. In the evenings, wildlife will often come out more in the open as it gets closer to nightfall.
How do I choose the right camera settings for capturing fast-moving wildlife?
To capture fast-moving wildlife, use a faster shutter speed to freeze the motion (1/1000th of a second or faster). Set your aperture to ensure your subject is in focus while considering the background, and adjust the ISO to balance the light sensitivity and minimize noise.
What composition techniques can I use to enhance my wildlife photographs?
To enhance your wildlife photographs, use the rule of thirds and the golden ratio to compose your shots. Incorporate natural elements like trees or rocks to frame your subject and try to shoot from the animal’s eye level to create a more impactful perspective.
How do you take good bird pictures?
For birds, use a fast shutter speed like 1/500 sec or faster to freeze wing beats and movement. Get “eye level” with the subject by getting down low. Use a silent shutter if available so you don’t scare birds away.
best shooting mode for wildlife photography?
For most wildlife photography, especially of moving subjects, the best shooting mode to use is shutter priority mode, denoted by the ‘S’ on your camera’s mode dial. This allows you to select your shutter speed while the camera determines the appropriate aperture.