Table of Contents

Achieving the perfect composition in food photography involves a combination of artistic principles, technical skills, and attention to detail. Today I will guide on all you need to know to be able to get the best composition to help you create visually appealing and mouth-watering food photos.
Composition in Food Photography: The Rule of Thirds
One of the fundamental principles of photography is the “Rule of Thirds.” It’s a simple but powerful concept that can significantly improve the composition of your food photos.
1. The Grid

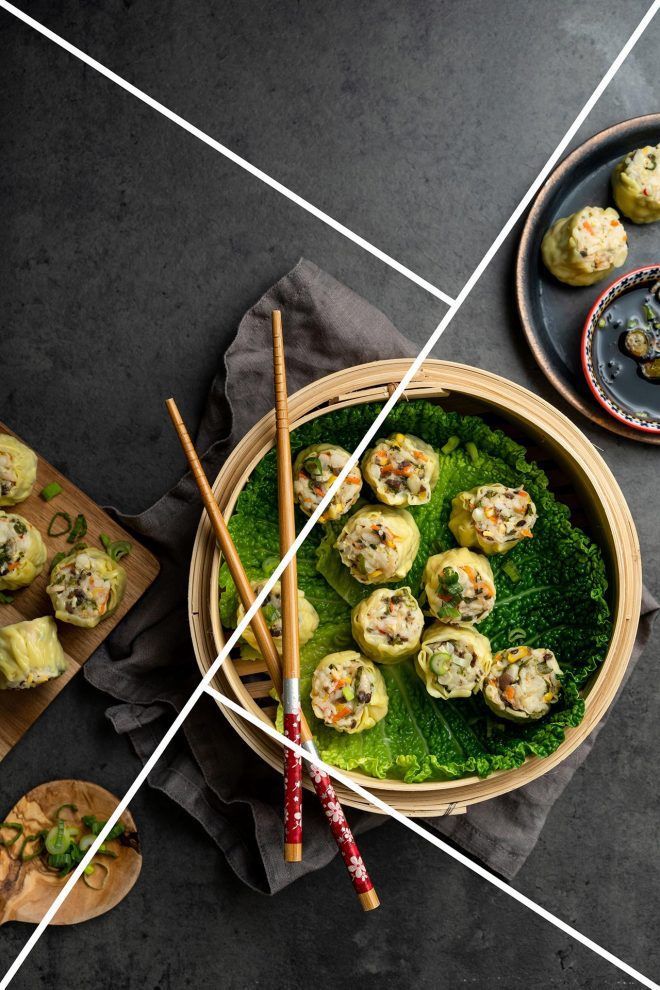
When we talk about balancing elements, we are referring to the distribution of visual weight within the frame. Visual weight is the perceived importance or prominence of elements in a photograph. The Rule of Thirds suggests dividing the image into a grid with two horizontal and two vertical lines, resulting in nine equal parts. The intersections of these lines become key points for placing elements of interest.
This is the most common composition trick in photography. Imagine dividing your photo into nine equal parts by drawing two horizontal and two vertical lines, creating a tic-tac-toe grid. The points where these lines intersect are the areas where you should place your main subject or points of interest.
2. Balancing Elements

Use this grid to place your dish, garnishes, and other elements. Placing the main subject at the intersection points or along the lines creates a well-balanced and visually engaging composition.
3. Negative Space

Don’t clutter the frame with too many elements. Leaving empty space in your composition, known as “negative space,” can add elegance and focus to your food photography.
Framing and Angles
Experimenting with different angles can create a variety of moods and tell different stories in your food photos.
1. Overhead Shots

Shooting from directly above the dish is a classic angle for food photography. It provides a clean and symmetrical view of the dish, making it ideal for showcasing intricate details and arrangements.
2. 45-Degree Angle

Photographing your dish from a 45-degree angle is a common choice. It adds depth and dimension to your composition and allows you to capture the plate’s surface, revealing texture and color.
3. Side View

A side view, where the camera is parallel to the dish, can emphasize layers and height in your food. It’s perfect for showing off stacked or layered dishes.
4. Close-Ups and Macro Shots

Getting up close and personal with your subject can highlight textures, colors, and details that might be missed in wider shots. This is where macro lenses or smartphone macro modes come in handy.
5. Creative Angles

Don’t be afraid to experiment with unique angles to create drama and capture the essence of your dish. Try a low angle for an immersive view, or use a Dutch angle (tilting the camera) for a playful, dynamic shot.
Read more about food photography equipment.
Using Depth of Field

Controlling the depth of field in your photos can also impact the composition and visual appeal.
1. Shallow Depth of Field
Using a wide aperture (low f-number) creates a shallow depth of field. This blurs the background, drawing attention to the main subject and creating a dreamy, cinematic look.
2. Deep Depth of Field
A narrow aperture (high f-number) provides a deep depth of field, ensuring more elements in your frame remain sharp and in focus. This can be effective for capturing entire scenes or complex arrangements.
Experiment and Find Your Style
Food photography is an art, and there are no strict rules. The key is to experiment with different compositions and angles to find your unique style and to capture the desired emotions in your viewers. Now get your camera and hit that shutter button!!!
Feel free to connect with across our social media platforms @ Instagram, Facebook and Twitter.

